Easy Chocolate Covered Pretzels: Your Ultimate Guide to Sweet & Salty Perfection
Craving a delightful snack that effortlessly balances salty crunch with decadent sweetness? Look no further than chocolate covered pretzels! These irresistible treats are not just for special occasions; they transform everyday ingredients into a party in your mouth, perfect for gifting, entertaining, or simply enjoying a cozy night in. Forget store-bought versions – learning how to make homemade chocolate covered pretzels opens up a world of customization and flavor possibilities that are surprisingly simple to achieve.
There’s a unique satisfaction that comes from creating your own gourmet snacks, and this classic sweet-and-salty combination is a prime example. From selecting your favorite chocolate to personalizing with endless toppings, making chocolate covered pretzels is a creative and rewarding endeavor. Let's dive into transforming humble pretzels into a glossy, snappy, and utterly addictive confection.
Why Homemade Chocolate Covered Pretzels Are a Game Changer
The allure of chocolate covered pretzels lies in their exquisite contrast. The crisp, savory snap of a pretzel perfectly complements the rich, smooth embrace of chocolate. While popular brands like FLIPz have introduced many to this delightful duo, making them at home elevates the experience to a whole new level. Why settle for mass-produced when you can craft a batch tailored precisely to your taste?
- Unmatched Freshness: Homemade treats always taste better. You control the quality of ingredients, ensuring the freshest, most vibrant flavors in every bite.
- Endless Customization: This is arguably the biggest draw. You're not limited to a few standard flavors. Want dark chocolate with sea salt? Or white chocolate with sprinkles? The choice is yours!
- Simple & Fun: Despite their professional appearance, making these treats requires minimal effort and no baking. It's a fantastic activity for all ages, making it a fun kitchen project for families.
- Budget-Friendly: Crafting your own chocolate covered pretzels is often more economical than buying specialty versions, especially when you want to make a large batch.
Think of your pretzels as a blank canvas, ready to be adorned with your confectionery artistry. The process is easy, the ingredients are straightforward, and the results are consistently delightful.
The Essential Ingredients: Quality Matters for Perfect Results
While the ingredient list for chocolate covered pretzels is refreshingly short, the quality of what you choose makes a significant difference in the final product. Investing a little more in good chocolate will pay dividends in flavor, texture, and appearance.
Choosing Your Pretzels
The foundation of our treat! Most recipes recommend:
- Mini Pretzels: These are the classic choice, offering a perfect bite-sized canvas. Their traditional knot shape holds a good amount of chocolate and toppings.
- Pretzel Rods: Excellent for a more elegant, elongated look. They're also easier to dip evenly and less prone to breaking.
- Large Pretzel Twists: If you're going for a substantial, shareable treat, these can work, but they might require more chocolate and can be a bit messier to dip.
Pro Tip: Opt for sturdy, well-baked pretzels that won't crumble easily when dipped. Avoid overly fragile brands.
Selecting Your Chocolate
This is where many people go wrong. For that professional, snappy finish and rich flavor, choose wisely:
- Baking Chocolate Bars: This is your best friend. High-quality baking bars (like Ghirardelli, Baker's, Lindt, or Callebaut) are formulated to melt smoothly and set beautifully. They contain cocoa butter, which is crucial for tempering. You can choose from:
- Milk Chocolate: Sweet, creamy, and a crowd-pleaser.
- Semi-Sweet or Dark Chocolate: Offers a deeper, richer flavor, often preferred by adults.
- White Chocolate: A sweet, vanilla-forward option that also provides a vibrant base for colorful sprinkles.
- Avoid Chocolate Chips: While convenient, most chocolate chips contain stabilizers (like soy lecithin) that prevent them from melting into a perfectly smooth, fluid consistency ideal for dipping. They tend to be thicker and can result in a duller, less stable coating.
- Melting Wafers/Compound Chocolate: If you're completely new to chocolate work and want an absolutely foolproof melt without tempering, compound chocolate or "candy melts" are an option. They melt smoothly without needing precise temperature control, but they don't offer the same rich flavor or "snap" as real chocolate. For truly outstanding chocolate covered pretzels, real baking chocolate is paramount.
Mastering the Melt: The Secret to Professional-Looking Pretzels
Have you ever experienced chocolate that seized, turned streaky, or melted too easily at room temperature? The secret to avoiding these common pitfalls and achieving a glossy, firm, and snappy coating for your chocolate covered pretzels lies in one technique: tempering. While it might sound intimidating, tempering chocolate is surprisingly easy, even for beginners, and can be done effectively in your microwave!
Tempering ensures that the cocoa butter crystals in your chocolate are in a stable form, resulting in that desirable snap, shiny finish, and resistance to melting at room temperature. Don't worry, you don't need a professional kitchen setup.
Simple Steps for Tempering Chocolate (Microwave Method)
- Finely Chop Your Chocolate: This is crucial. Smaller pieces melt more evenly and prevent overheating. Use a sharp serrated knife to get a fine chop.
- Melt Two-Thirds: Place about two-thirds of your finely chopped chocolate in a microwave-safe bowl. Heat in short bursts (30 seconds, then 15 seconds), stirring thoroughly after each interval. Heat until the chocolate is mostly melted and smooth, but a few small lumps might remain. Aim for a temperature around 110-115°F (43-46°C) for dark chocolate, slightly lower for milk or white.
- Seed with Remaining Chocolate: Add the remaining one-third of your finely chopped chocolate to the melted chocolate. Stir continuously until all the added chocolate has melted and the mixture is smooth and slightly cooled. This "seeds" the melted chocolate with stable crystals.
- Check the Temperature: Using an instant-read thermometer, aim for a working temperature of 88-91°F (31-33°C) for dark chocolate, or 84-87°F (29-30°C) for milk/white chocolate. If it's too warm, add a few more pieces of chopped chocolate and stir until they melt and cool the mixture. If it's too cool and thick, gently warm it for a few seconds (5-10 seconds max) in the microwave, stirring well.
Crucial Tips for Success:
- Absolutely No Water: Even a tiny drop of water can cause chocolate to "seize," turning it into a thick, gritty, unworkable paste. Ensure your bowls and utensils are perfectly dry. If using a double boiler, make sure no steam or water gets into the chocolate.
- Don't Overheat: Overheating chocolate can burn it or cause it to become grainy and unusable. Low and slow is the way to go.
- Use a Thermometer: While not strictly essential for *every* attempt, an instant-read thermometer vastly increases your chances of perfect tempering, especially if it's your first time.
For a deeper dive into achieving that perfect, glossy finish every time, check out our detailed guide: Secrets to Shiny, Snap-Perfect Chocolate Covered Pretzels.
Dipping and Decorating: Unleash Your Creativity
Once your chocolate is perfectly melted and tempered, the fun truly begins! This is where you can let your imagination run wild and truly customize your chocolate covered pretzels.
Dipping Techniques:
- Prepare Your Workspace: Lay out parchment paper or wax paper on a baking sheet. This prevents sticking and makes cleanup easy.
- Dip Evenly: Hold a pretzel by one end and dip it into the chocolate, swirling gently to coat completely or partially, as desired. Allow any excess chocolate to drip back into the bowl. You can gently tap the pretzel against the side of the bowl to encourage dripping.
- Placement: Lay the dipped pretzel onto the prepared parchment paper.
For more specific guidance on dipping and troubleshooting common issues, explore our article: No-Fail Chocolate Covered Pretzels: The Trick to Perfect Coating.
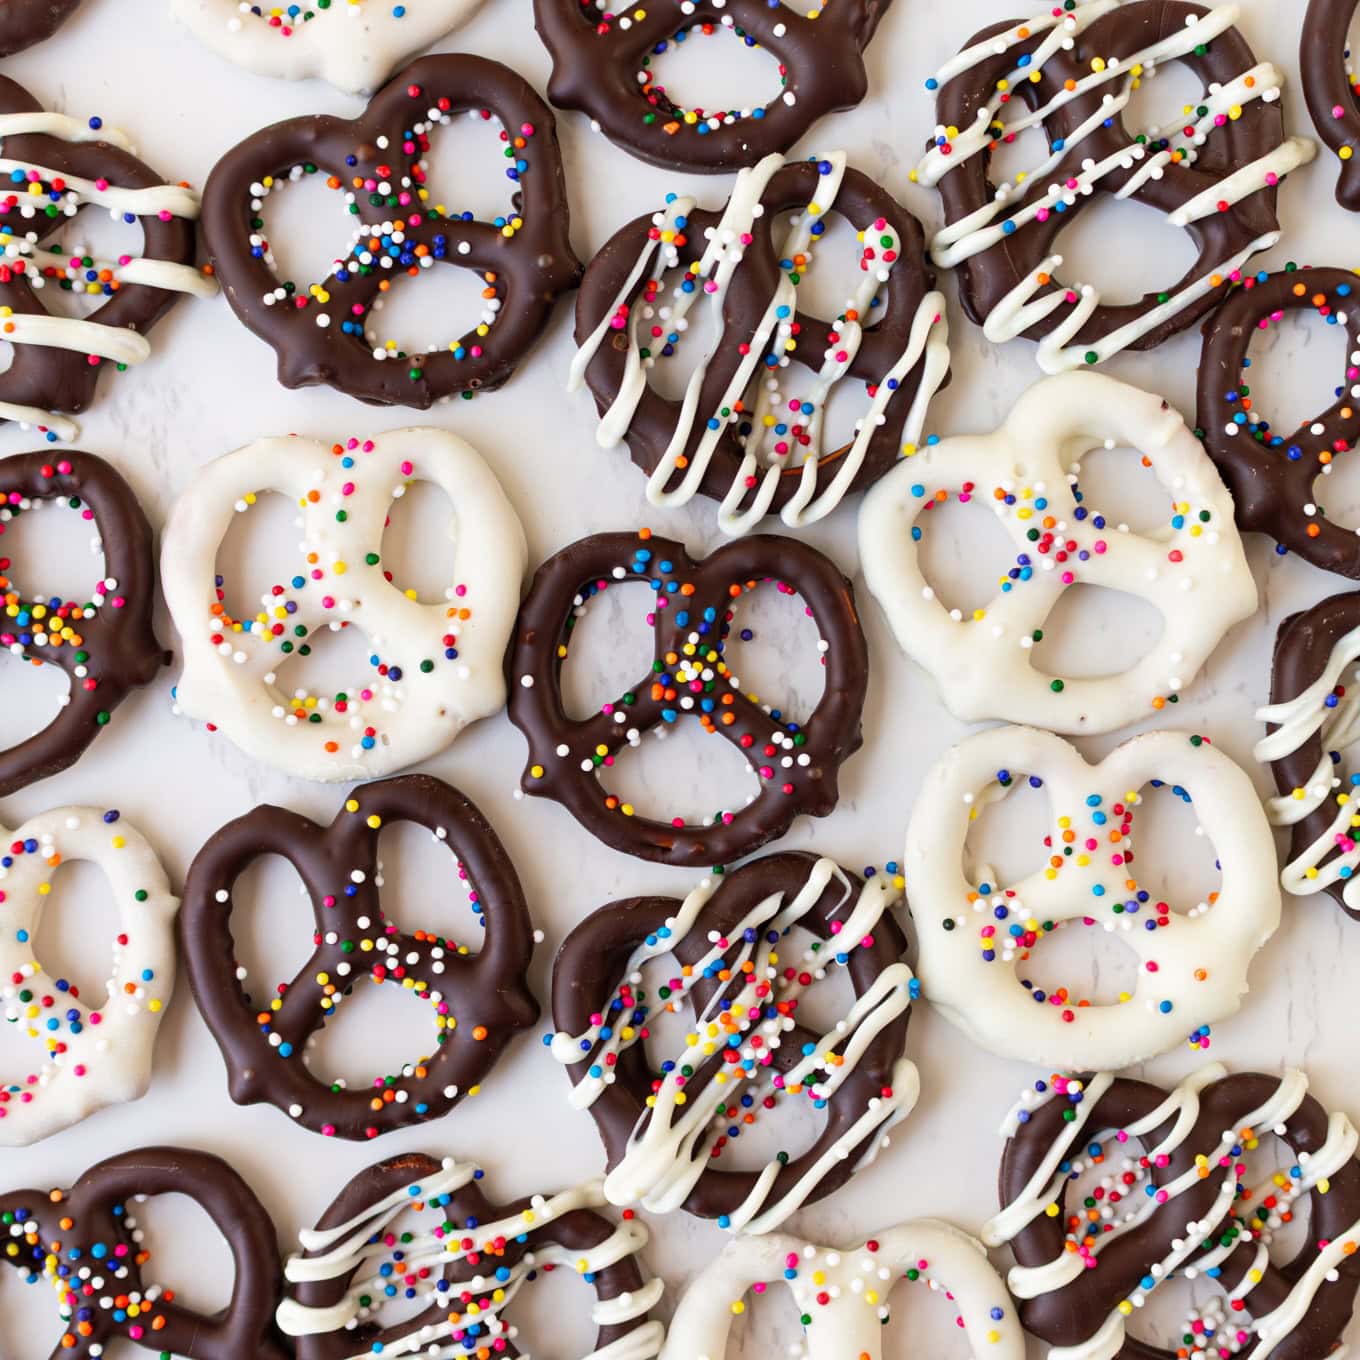
Endless Topping Ideas:
This is where your chocolate covered pretzels truly become unique. Add toppings immediately after dipping, while the chocolate is still wet.
- Classic & Colorful:
- Sprinkles: Rainbow, seasonal, themed – the options are endless.
- Crushed Candy: Peppermint for holidays, M&Ms, or crushed gummy bears for a chewy twist.
- Nutty & Crunchy:
- Chopped Nuts: Peanuts, almonds, pecans, walnuts, pistachios.
- Toffee Bits: Adds a rich, buttery crunch.
- Crushed Cookies: Oreos, graham crackers, or shortbread.
- Gourmet & Savory:
- Flaky Sea Salt: A timeless pairing with chocolate, enhancing both sweet and savory notes.
- Coconut Flakes: Toasted or untoasted, for a tropical touch.
- Drizzles: Drizzle with a contrasting chocolate (e.g., white chocolate over dark, or vice versa) for an elegant finish.
- Spices: A tiny pinch of cayenne pepper or chili powder for a surprising kick.
Setting & Storage:
Allow your decorated chocolate covered pretzels to set completely at room temperature or in the refrigerator for quicker setting (especially if it's warm). Once firm, store them in an airtight container at room temperature for up to two weeks, or in the refrigerator for an even longer shelf life (though they rarely last that long!).
Common Pitfalls and How to Avoid Them
While making chocolate covered pretzels is generally straightforward, here are a few common issues and how to prevent them:
- Seized Chocolate: As mentioned, water is the enemy. Ensure all equipment is bone dry. If using a double boiler, prevent steam from entering the chocolate.
- Dull or Streaky Coating: This usually indicates improperly tempered chocolate. Review the tempering steps to ensure your chocolate sets with a beautiful shine. Rapid cooling can also sometimes cause streaks; letting them set at room temperature often yields better results if the chocolate is well-tempered.
- Chocolate Melts Easily at Room Temperature: Another sign of un-tempered or improperly tempered chocolate. Correctly tempered chocolate should stay firm and not melt at typical room temperatures.
- Chocolate Too Thick: If your chocolate isn't fluid enough for easy dipping (especially if you're not tempering), you can add a very small amount (1/2 to 1 teaspoon) of neutral oil like coconut oil or vegetable shortening per cup of chocolate to thin it out. Be aware this can affect the chocolate's ability to fully harden and snap. However, if your chocolate is *tempered*, adding oil will break the temper, so avoid it in that case.
- Pretzels Breaking During Dipping: Be gentle! Use a fork or dipping tools to submerge and lift pretzels, reducing direct pressure.
Conclusion
Making your own chocolate covered pretzels is an incredibly rewarding experience, offering both creative expression and a truly delicious outcome. It's a testament to how simple ingredients, combined with a little care and technique, can produce something truly special. Whether you're whipping up a batch for a party, a thoughtful homemade gift, or a personal indulgence, the customizable nature of this treat ensures there's a perfect combination for everyone.
So, gather your favorite pretzels, choose your chocolate, and prepare to embark on a sweet-and-salty adventure. You’ll quickly discover why these easy-to-make, utterly addictive treats are a cherished classic, and why homemade truly tastes best!
